



Quick answer: Cream blush is a soft, creamy formula that melts into skin for a natural flush. Warm a small amount on your fingertip, tap it onto the apples of your cheeks, blend up toward your temples and set lightly with powder if you want it to last longer.
Table of Contents
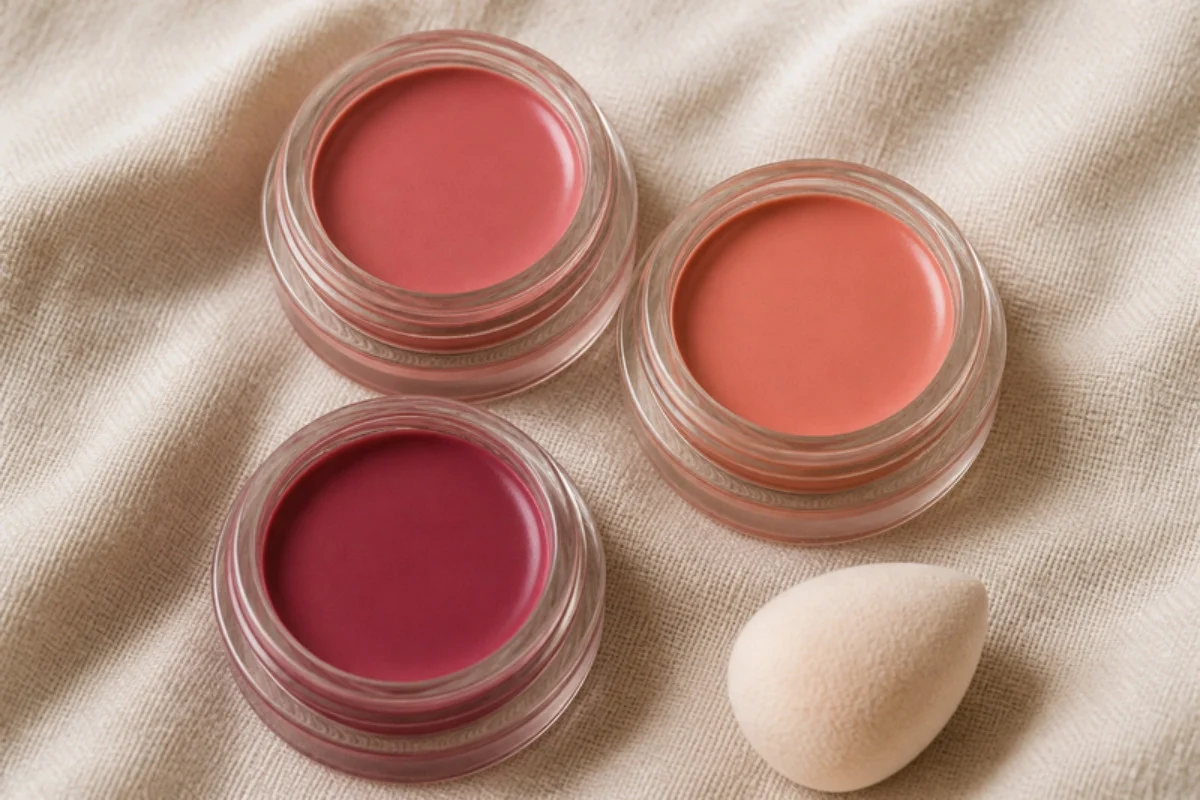
Cream blush vs powder blush
| Cream | Powder | |
|---|---|---|
| Finish | Dewy, skin-like | Soft matte |
| Best over | Bare skin or liquid base | Powdered base |
| Tools | Fingers, sponge, brush | Brush |
| Good for | Dry or normal skin | Oily skin |
Many people use both: cream first for a glow, a light layer of powder on top for staying power. If you like liquid formulas, see our liquid blush guide.
Who cream blush suits
Cream formulas are a good match if you like a fresh, skin-like finish or if powder tends to look dry on you. They are also handy for quick routines, because you can apply and blend with your fingers in seconds without a brush. If your skin is very oily, you may find that a cream fades faster on your cheeks, so try setting it with a thin layer of powder blush on top. People who wear little or no foundation often like cream textures the most, since they melt into bare skin and look natural in daylight. Keep a small compact in your bag for a quick touch-up during the day.
6 steps to apply cream blush
- Prep your skin. Moisturize and apply base first.
- Use a tiny amount. Start with a dot. You can always add more.
- Warm it up. Rub it on your fingertip so it blends easily.
- Tap, do not swipe. Tap onto the apples of your cheeks.
- Blend upward. Soften the edges toward your temples.
- Set if needed. A light dusting of powder helps it last.
Not sure where it goes? Our blush placement guide shows options for different face shapes.
How to choose a shade
- Fair skin: soft pinks and light peaches usually look natural.
- Medium skin: rosy pinks, warm peaches and soft corals are easy picks.
- Deep skin: berry, brick and rich coral shades show up well.
- Not sure? Pinch your cheeks and pick the shade closest to that natural flush.
- For a no-makeup look: choose a sheer formula you can build up slowly.
Swatch on your cheek in daylight, not on the back of your hand, since the color can look different on your face.
Common mistakes to avoid
- Using too much at once. A heavy layer is hard to blend, so build it up in thin taps instead.
- Applying it over a lot of powder. Creamy textures can grab and look patchy on top of powder.
- Placing it too low. Blush that sits below the apples can drag the face down.
- Skipping the blend. Hard edges make the color look painted on rather than natural.
- Forgetting your neck and ears. A tiny touch there can tie the whole look together.
Fix a too-strong flush by pressing a clean, damp sponge over it to lift some color.
Hygiene and patch test
Clean the brushes you use with cream products often. The AAD suggests washing makeup brushes every 7 to 10 days (AAD). The AAD suggests testing a new product on a small area of skin twice a day for several days and stopping if a reaction appears (AAD).
For a full routine, see how to do makeup and a natural makeup look. A little cream blush makes the whole face look fresh.
FAQ
Can I use cream blush on lips?
Many formulas say they work on lips and cheeks. Check the label.
Does cream blush go before or after powder?
Before powder. Cream over powder can look patchy.
Is cream blush good for dry skin?
Many people with dry skin like its dewy finish.
How do I make it last?
Set it with a light layer of powder blush or setting powder.
Fingers or sponge?
Both work. Fingers warm the product; a damp sponge sheers it out.
How much should I use?
Start with a small dot per cheek.
Related guide: Highlighter Makeup: Where to Apply It for a Soft Glow.
Written by Mahmoud Abdelmaksoud.


1 comment